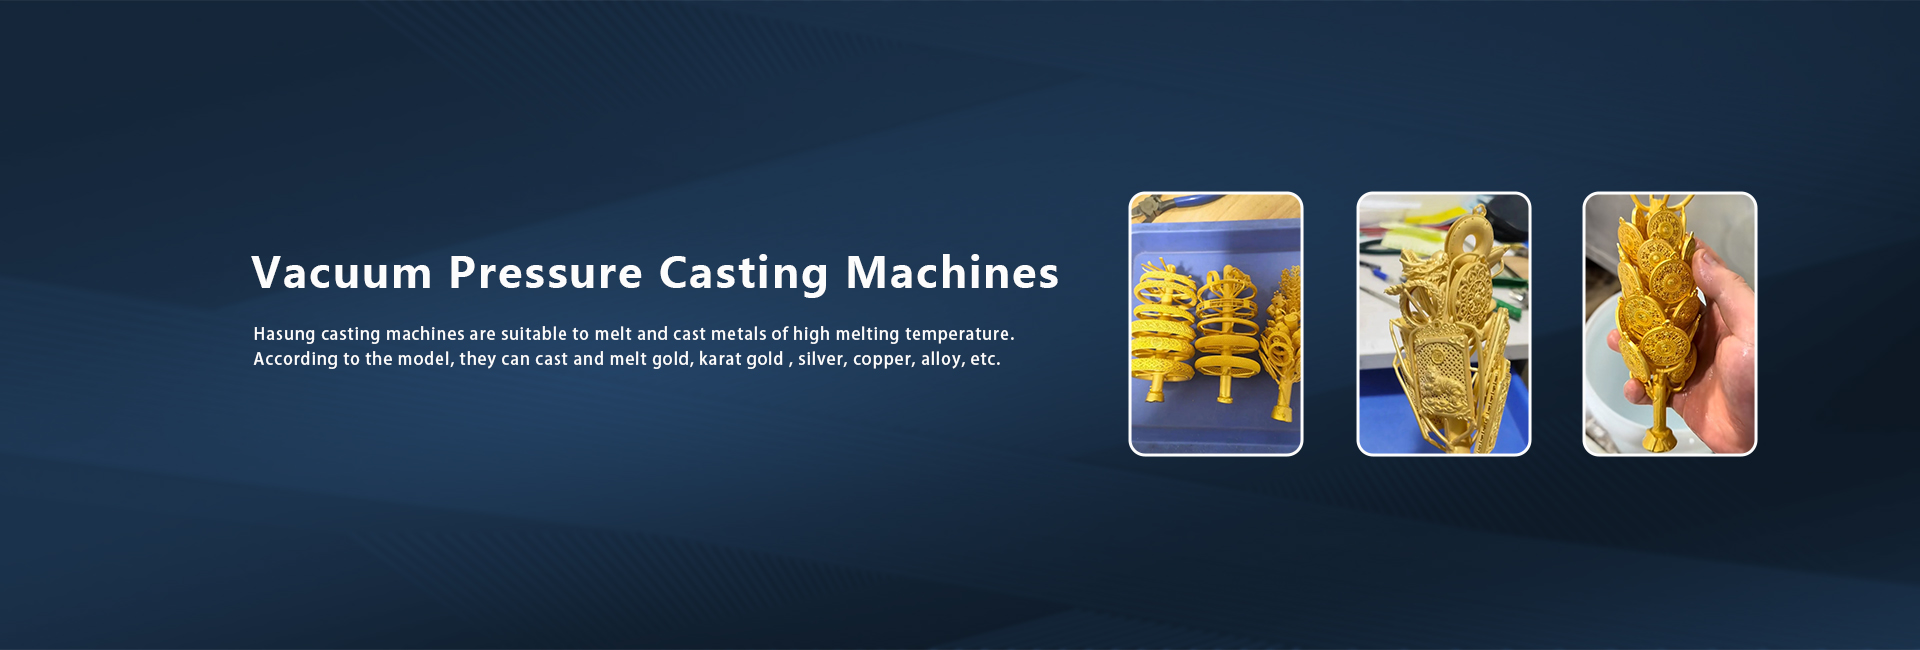
Vacuum Pressure Casting Machines
HASUNG casting machines are suitable to melt and cast metals of high melting temperature. According to the model, they can cast and melt gold, Karat gold, silver, copper, alloy with TVC, VPC, VC series, also steel, platinum, palladium with MC series.
The basic idea of the HASUNG vacuum pressure casting machines is to close the cover and start the heating up once the machine has been filled with metal material.
The temperature may be selected by hand.
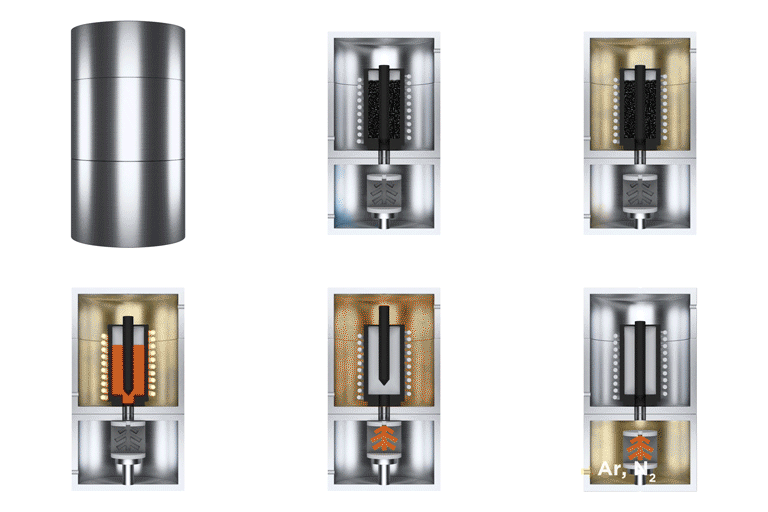
The material is molten under protective gas (argon/nitrogen) to avoid oxidation. The melting procedure could be seen easily by the observing window. The crucible is placed centrally in the upper part of the air-tight closed aluminium chamber in the core of the induction spool. In the meantime the flask with the heated up casting form is placed in the lower part of the stainless steel vacuum chamber. The vacuum chamber is tilted and docked under the crucible. For the casting process the crucible is set under pressure and the flask under vacuum. The difference of pressure leads the liquid metal into the finest ramification of the form. The required pressure could be set from 0.1 Mpa to 0.3 Mpa.
The vacuum avoids bubbles and porosity.
Afterwards the vacuum chamber is opened and the flask could be taken out.
The TVC, VPC, VC series machines are equipped with a flask lift which pushes the flask towards the caster. This simplifies the removal of the flask.
The MC series machines are tilting vacuum casting type, with 90 degrees turning specially designed for high temperature metals casting. It has replaced centrifugal casting.
-

Hasung- VPC Series Jewelry Vacuum Pressure Casting Machine
Applicable metals:
Metal materials such as gold, silver, copper, and K goldApplication industry:
Industries such as jewelry factories, alloy casting, eyewear, and handicraft castingProduct features:
1. Manual control operation, Germany IGBT induction heating, saving labor and allowing for easy operation with just one touch
2. Integrated melting and casting, rapid prototyping, 3-5 minutes per furnace, high efficiency
3. Inert gas shielded melting, vacuum pressure casting, high density of finished products, no sand holes, and almost no loss
4. Accurate PID temperature control system, temperature control within ± 1 ℃
5. The components are sourced from internationally renowned brands such as Shimaden and Izumi from Japan SMC、 IGBT from Yadeke, Siemens, Infineon, etc. -

VCT Series Vacuum Pressure Casting Machine with PLC Touch Screen
NEXT vacuum pressure machine by Hasung is your next machine to create quality.
1 Support flask with flange and flask without flange
2. Good melting speed, energy saving
3. Inert Gas – with good filling pieces
4. Precise gauge with improved pressure sensing
5. Easy to maintain
6. Accurate pressure timing
7. Self-diagnosis – Taiwan Weinview PLC touch panel auto-tuning
8. Easy to operate, one botton to finish the whole casting process9. After mode without oxidation
10. Variable heat for gold loss
11. Vacuum pressure, argon pressure, temperature, pouring time, pressure time, vacuum time.
-

TVC Series Induction Vacuum Pressure Casting Machine for Gold Silver Copper
Full Automatic Vacuum Pressure Casting Machine
New technology for enhancing casting results
The Hasung Casting System
1.Closing the cover automatically, all is automaticlly operating for casting generally improves material flow and mould filling
2.Castings exhibit a higher and more consistent density
3.Porosity is substantially reduced
4. Withstand Max. 4 bars casting pressure.
5. SBS cutting system without using gaskets, save costs.
6.Castings have greater stress and elasticity properties, making them easier to process further.
7. Easy touch operation with useful parameter screen
8. 100 programs avaiable.
-

VCT Vacuum Pressure Casting Machine for Jewellery
Pressure over Vacuum Casting Machines
VCT is a family of pressure over vacuum casting machines designed to meet the more severe needs in lost wax casting production of gold, K-gold, copper, bronze, alloys. They are often used in connection to a 3d printer for direct casting to get the first metal parts of complex objects.
This family of machines works with a new, revolutionary double chamber concept. This innovative system gives several advantages compared with the traditional single chamber suction system currently available in the market.
In VCT, melting chamber and flask chamber are completely indipendent: while casting, the machine can control the metal injection into the mold by applying a differential pressure during pouring. This yields to a faster injection compared to the simply gravity pouring with the benefit to cast items at lower temperature. This will result in better surface finishing and reduced shrinkage of the cast parts.The casting cycle takes only few minutes and, while the previous flask is cooling down in protective gas for no oxidation, the next charge can be loaded into the crucible and melted, thus overlapping two cycles for no time waste.
The machine is fully automatic, featuring a PC based monitoring system for process parameters acquisition and production data management, with easy editing of casting programs suitable for many kind of alloy.
This revolutionary machine is the synthesis of the most advanced engineering and years of experience in casting that only Hasung will bring in your factory.
-

Hasung T2 Jewelry Vacuum Pressure Casting Machine
NEXT vacuum pressure casting machine by Hasung is your next machine to create quality.
T2 advantages:
1. After mode without oxidation
2. Variable heat for gold loss
3. Extra mixing for good segregation of gold
4. Good melting speed
5. De-Gas – with good filling pieces for metals
6. Precise double-needle gauge with improved pressure sensing
7. Easy to maintain while casting
8. Accurate pressure timing
9. Self-diagnosis – P.I.D auto-tuning
10. Memory of parameter for best casting
11. Casting System Vacuum pressure casting system – max. pressure 0.3MPa with internal gas tank
12. Replacing Gas Single gas (Argon)
13. Program Memory 100 memories
14. Control Specially designed microprocessor control. Temperature control by PID with accuracy of +/-1 degrees centigrade.
15. Heating Induction heating (with specially designed metal stirring function). -

Mini Vacuum Pressure Casting Machine for Platinum Palladium Steel Gold Silver
Hasung Precious Metals SVC/MC Equipment advantages
The SVC/MC series are extremely versatile casting machines suitable for a wide range of applications for metal castings – and a number of options that were considered mutually incompatible up to now. Thus, while the MC series was originally designed as a high-temperature casting machine for casting steel, palladium, platinum etc. (max. 2,100° C), large flasks also make it suitable for economically producing castings in gold, silver, copper, steel, alloy and other materials.
The machine combines a dual-chamber differential pressure system with a tilting mechanism. The casting process is achieved by rotating the entire melting-casting unit by 90°. One benefit of the tilting system is the use of economically priced graphite or ceramic crucibles (without holes and sealing rods). These tend to have a longer service life. Some alloys, such as copper beryllium, quickly cause crucibles with holes and sealing rods to become untight and therefore useless. For this reason, many casters have so far processed such alloys only in open systems. But this means they can’t choose to optimise the process with overpressure or vacuum.
-

Tilting Vacuum Pressure Casting Machine for Platinum Palladium Gold Silver Steel
Hasung Precious Metals Equipment advantages
The product has uniform color and no segregation:
The porosity is reduced, and the density is higher and constant, reducing post-processing work and reducing loss.
Better material fluidity and mold filling, lower enthusiasm risk:
Vibration improves material flow, and the material structure is more compact. Improve shape filling and reduce the risk of hot cracks
The grain size is reduced to 50%:
Solidify with a finer and more uniform structure
Better and more stable material properties:
The tensile strength and elasticity are increased by 25%, and the subsequent processing performance is improved.
Q: What Is the Vacuum Casting Method?
Investment castings, which are often referred to as lost-wax castings, are metal parts that are produced by the investment casting process. This expendable mold process and the components that it produces is extremely popular for countless applications in numerous industries. This is largely due to the fact that the investment casting process makes it possible to create complex parts with exceptional surface qualities and accuracy in a wide range of materials and sizes. However, if a part requires intricate details or undercuts, the material is reinforced by fiber or wire, or air entrapment is a problem, a specific type of investment casting method is used. This investment casting technique is none other than the vacuum casting method, which produced vacuum castings. What are vacuum castings? Keep reading to find out.
What Are Vacuum Investment Castings?
Vacuum castings are the metal parts that are produced by the vacuum casting method. They are different than typical investment castings due to the technique that is used to create these metal parts. The process begins by placing a piece of plaster mold in a vacuum chamber. The vacuum then draws the molten metal into the mold. Finally, the casting is solidified in an oven and the mold is removed in order to release the final product.
If you have a project that requires high-quality vacuum investment castings for jewellery or other metals, we can provide them for you. Here at Hasung, we utilize both gravity fed and vacuum casting methods to produce gold, silver, platinum, metal components that range. Our countless years of experience in both of these methods guarantee that we can supply superior or near net shape parts that require little or no finish work. Get the investment castings that you need, delivered on time and at a competitive price, by contacting us today!
Q: How to cast jewelry?
Jewelry casting is a process of making jewelry pieces that involves the pouring of liquid metal alloy into a mold. It is usually referred to as lost-wax casting because the casting mold is created using a wax model that is melted away to leave a hollow chamber in the middle of the mold. The technique has been used for thousands of years, and is still widely used today by both master craftsmen and home crafters to make precise reproductions of original jewelry pieces. If you are interested in creating your own jewelry using the casting technique, follow these steps for how to cast jewelry.
1. Crafting Your Mold
1) Carve a piece of hard modeling wax into your desired shape. Start simple for now, as complex molds are much harder to keep together at first. Get a piece of modeling wax and use a precision knife, Dremel, and any other tool needed to make a model of your jewelry. Whatever shape you make now will be the shape of your finished piece.
You are making an exact replica of your eventual jewelry.
Using a piece of jewelry you like as a model will help you design better pieces when you first start.
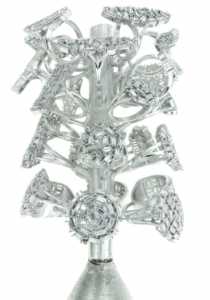
2) Attach 3-4 "sprues," wax wires that will provide a channel for the wax to melt out later. Using some more wax, craft several long, wires out of wax and attach them to the model so that they all lead away from the piece. This is easier to understand when you see the whole process—this wax will be covered in plaster, then melted out to make a hollow version of your shape. You then fill in the hollow part with silver. f you don't make sprues, the melted wax can't actually get out and make a hollow area.
For smaller pieces, like a ring, you may only need one sprue. Larger pieces, like belt buckles, may need up to ten.
All the sprues should meet at the same place. They will need to be attached to a sprue base.
3) Attach the mold to the sprue base using a bit of melted rubber. The sprues all meet together, and you attach the mold to the sprue base where all the sprues meet. This allows the wax to melt through the bottom of the base and leave the mold.
4) Put the flask on top of the sprue base, making sure you have a quarter inch between the wall of the flask and the model. The flask is a big cylinder that slides on top of the sprue base.
2. Investing the Mold
1) Secure the wax model stand to the bottom of a casting flask, using more melted wax. The model should be propped up in the flask. It is ready for the jewelry casting process.
Note: In the video, the excess silver parts are other pieces of jewelry going along with the belt buckle. They are not extra sprues or necessary additions.
2) Mix the dry ingredients of the gypsum plaster-based investment mold material with water, as per manufacturer's directions. Follow the instructions of whatever investment mold you choose to purchase—it should be a simple set of measurements.
Wear a mask or respirator whenever possible as you work with this powder—it is not safe to inhale.
Move on once you have the mix the consistency of pancake batter.
3) Place the investment mold in a vacuum chamber to remove any air bubbles. If you do not have a vacuum sealer, you can just let it sit for 10–20 minutes. Air bubbles will create holes, which may allow the metal to seep in and create a pock-marked final piece of jewelry.
4) Pour the investment mold mixture into the flask, surrounding the wax model. You will completely encase your mold in plaster. Re-vacuum the mixture to get rid of any last, small bubbles before moving on.
Wrap a layer of tap around the top of the flask, so that half the tape sit's over the lip and helps contain the plaster from bubbling over.
Allow the investment mold to set. Follow the exact instructions and drying time for your plaster mix before moving on. When done, remove the tape and scrape any excess plaster from the top of the mold.
5) Place the entire flask in a kiln set to approximately 1300 degrees F (600 degrees C). Note, different plasters may have different temperatures. However, you should not be at anything less than 1100. This will harden the mold and melt the wax away, leaving a hollow chamber in the center of the cast jewelry mold.
This may take up to 12 hours.
If you have an electronic kiln, try to set it to slowly raise the temperature up to 1300. This can help prevent cracking.
6) Remove the flask from the kiln while hot, and check the bottom of the mold for obstructions. Make sure that the hot wax can easily leak out of the mold, and that there is nothing obstructing it. If there is nothing in the way, shake the flask gently to make sure all the wax came out. There should be a puddle of wax in the reservoir of the flask or at the bottom of the kiln.
Make sure you wear safety gloves and goggles.
3. Casting the Jewelry
1) Place your metal of choice in a pouring crucible, then melt it inside a foundry. The melting temperature and time will be determined by the type of metal you are using. You can also use a blow-torch and small crucible to melt your silver. This is hand pouring type casting for small production purpose.
2) Use a jeweler's vacuum type casting (Vacuum Pressure Casting Machine) to pour the metal into the mold. For professional jewelry, you'll need a vacuum type casting machine with inert gas for protection. This evenly distributes the metal quickly, but it is not the only option you have for casting. The more classic, easier solution is to simply pour the metal careful into the tunnel left by the base of the mold.
You could use a large, metal-specific syringe to pump the metal into the mold, too.
3) Allow the metal to cool for 5–10 minutes, then dunk it slowly in cold water. The amount of time it needs to cool is dependent, of course, on the metal melted and used. Dunk too soon and the metal may crack—dunk too late and it will be hard to remove all the plaster from the hardened metal.
Look up cooling times for your metal before moving on. That said, if you're in a pickle you can just wait 10 minutes and then dunk in cold water.
The plaster should begin dissolving away as you shake it around the cold water.
4) Tap the mold gently with a hammer to break away any excess plaster and reveal the jewelry. Separate the flask from the sprue base and use your fingers or a toothbrush to peel away any last bit's stuck to the jewelry.
4. Finishing Your Jewelry
1)Use an angle grinder with a cut-off wheel to cut away any lines of metal from the sprues. Cut away the thin pieces of metal that you needed to create a hole to pour the metal in. A hand-held grinder should be more than strong enough.
2)Consider and acid bath or wash to clean off any last bit's of plaster. The firing process often leaves metal dingy and dirty looking. You can look into specific washes for certain metals, which will lead to a much nicer shine and an easier job cleaning up the piece later.
3)Buff out any irregularities on the jewelry piece using a metal buffing wheel. Use files, enamel clothes, polishes, etc. to clean the piece up to your desired style. If you planned on setting a stone, do it after you finish polishing.


